Greetings, Everyone! This post will cover everything you need to know to set up your first three.js scene. Buckle up and let’s dive in.
Before we begin, let me share some information about three.js
What is three.js?
Three.js is a Javascript library that lets you create 3D scenes in the browser without the help of plugins. It uses the WebGL API to transform your browser into a 3D environment, opening a world of web design, animation, and interactivity opportunities. On the three.js website, you can check out some of the best interactions created by talented developers. With this being said, let’s dive into the setup.
Project Setup
There are two ways to add three.js to your project.
1. Import three.js using a CDN
This approach is simple. It allows us to copy the CDN (Content Delivery Network) of three.js to our website.
To integrate the three.js library, we need to copy and paste this script into our HTML file.
<script src="https://cdnjs.cloudflare.com/ajax/libs/three.js/r125/three.min.js"></script>
2. Install three.js with npm or yarn package
Alternatively, if we have Node.js installed on your PC, we can install three.js using npm or yarn.
npm install threeOr
yarn add threeAfter we install the package successfully, we can import it to our javascript file. For this, we will use the import function.
import * as THREE from 'three'Well, the three.js library is now successfully integrated into our project. We can start creating right away.
HTML, CSS, and JavaScript setup
Like a regular website, our website needs HTML, CSS, and Javascript setup. Below, I have written a simple HTML file. I have pasted the three.js CDN on the bottom of the file. I also added a canvas element with an ID of canvas. Our three.js scene will be inside the canvas element.
<!DOCTYPE html>
<html lang="en">
<head>
    <meta charset="UTF-8">
    <meta name="viewport" content="width=device-width, initial-scale=1.0">
    <title>Our First Three.js Website</title>
    <link rel="stylesheet" href="style.css">
</head>
<body>

    <canvas id="canvas"></canvas>

    <script src="https://cdnjs.cloudflare.com/ajax/libs/three.js/r125/three.min.js"></script>

</body>
</html>
Our canvas needs a bit of styling so that it covers the whole width and height of our device. Alternatively, we can set our canvas to cover any amount of width and height of our viewport.
* {
    margin: 0;
    padding: 0;
    box-sizing: border-box;
}
html, body {
   height: auto;
   width: 100vw;
}
#canvas{
   position: block;
   width: 100%;
   height: 100vh;
}
Well, after setting up our HTML and CSS, it’s time to dive into the main course.
A three.js scene contains three main components – a scene, a camera, and a renderer. Without those 3 components, we can’t renderer anything in our canvas. Let’s go through each of them one step at a time.
The Scene
A scene serves as a container that holds all the 3D objects, lights, cameras, and environments. We can initialize a scene by extending the THREE.Scene() class.
const scene = new THREE.Scene();We can then add any element to our scene using scene.add() function.
The Camera
Similar to a real-world video camera, a three.js camera is an essential element that defines what part of the 3D scene is visible in our canvas. There are different types of cameras in three.js. The main ones are a perspective camera and an orthographic camera.
In the example below we will set up a perspective camera and add it to our scene.
const camera = new THREE.PerspectiveCamera(75, window.innerWidth / window.innerHeight, 1, 100);There are 4 parameters in a perspective camera. The first parameter is the field of view and it is set as degrees. The second parameter is the aspect ratio. It is the ratio of the inner width to the inner height of the screen. The third and fourth parameters are the near-clipping plane and far-clipping plane respectively. They are basically how near and far can the camera render.
After defining our camera, we have to add it to our scene.
scene.add(camera);Finally, we have to position it and move it away from the center – 5 units away along the z-axis.
camera.position.set(0, 0, 5);The Renderer
A renderer is an essential three.js component that is responsible for translating the 3D scene into a 2D plane visual output. It calculates the data from the camera and scene to generate a 2D image visible on the screen. In three.js, the most common renderer is the WebGLRenderer.
First, we need to define our canvas. In our HTML file, the canvas is defined with an ID of “canvas”. Time to call that in our javascript.
const canvas = document.getElementById('canvas');We can then initialize our renderer. We have to set the canvas property to the canvas we created earlier.
const renderer = new THREE.WebGLRenderer({ antialias: true, canvas: canvas });The next step will be to set the size and pixel ratio of our renderer and append it to the canvas.
renderer.setSize(canvas.clientWidth, canvas.clientHeight);
renderer.setPixelRatio(Math.min(window.devicePixelRatio, 2))
The final step will be to render the scene. We will use the render function to render our renderer.
renderer.render(scene, camera);That’s it! Our three.js scene is ready. Hold on! Why is it showing a blank screen? That’s because we haven’t added an object yet.
Adding a three.js Cube
In three.js we can add different types of objects – varying from simple shapes to complex 3D models. In this example, we will add a simple red cube.
Any 3D object in three.js contains two parameters – a Geometry and a Material. Geometry defines the shape of the 3D object and Material defines the appearance of the 3D object.
Combining the two parameters we can create a Mesh.
const geometry = new THREE.BoxGeometry(1, 1, 1);
const material = new THREE.MeshBasicMaterial({ color: 0xff0000 });

const cube = new THREE.Mesh(geometry, material);
scene.add(cube);
Congrats lads! We have just created our first-ever three.js scene. Let’s combine all the code into a single file and output the result on our local server.
<!DOCTYPE html>
<html lang="en">
<head>
    <meta charset="UTF-8">
    <meta name="viewport" content="width=device-width, initial-scale=1.0">
    <title>Our First Three.js Website</title>
    <style>
        * {
            margin: 0;
            padding: 0;
            box-sizing: border-box;
        }
        html, body {
            height: 100vh;
            width: 100%;
        }
        #canvas{
            position: absolute;
            top: 0;
            left: 0;
            width: 100%;
            height: 100%;
        }
    </style>
</head>
<body>

    <canvas id="canvas"></canvas>
    <script src="https://cdnjs.cloudflare.com/ajax/libs/three.js/r125/three.min.js"></script>
    <script>
        const canvas = document.getElementById('canvas');

        //scene
        const scene = new THREE.Scene();

        //camera
        const camera = new THREE.PerspectiveCamera(75, window.innerWidth / window.innerHeight, 1, 100);
        scene.add(camera);
        camera.position.set(0, 0, 5);


        // Adding a cube
        const geometry = new THREE.BoxGeometry(1, 1, 1);
        const material = new THREE.MeshBasicMaterial({ color: 0xff0000 });

        const cube = new THREE.Mesh(geometry, material);
        scene.add(cube);

        //renderer
        const renderer = new THREE.WebGLRenderer({ antialias: true, canvas: canvas });

        renderer.setSize(canvas.clientWidth, canvas.clientHeight);
        renderer.setPixelRatio(Math.min(window.devicePixelRatio, 2))
        renderer.render(scene, camera);


    </script>
</body>
</html>
The Final Output

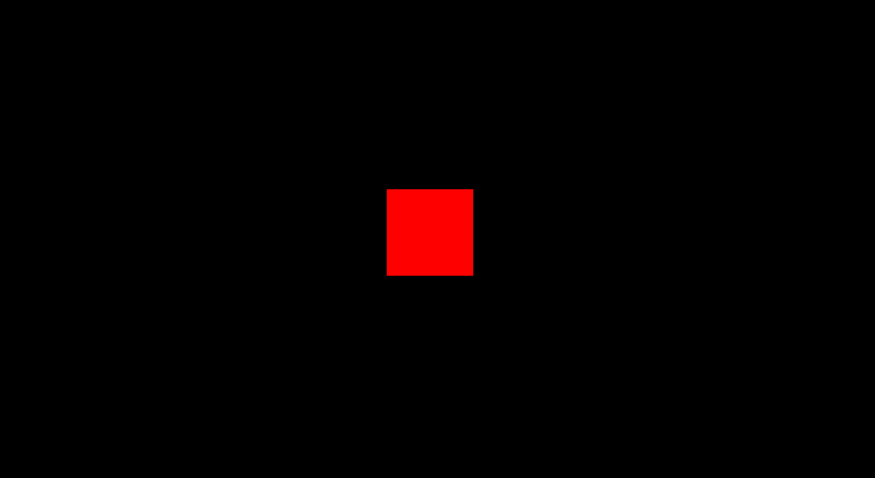
After running the code in our local server we will get this visual in our browser. You can change the size of the cube and its color to display different results.
Keep in mind that this is just a simple example. With three.js, the sky is the limit. You can create stunning scenes and interactions that are out of this world.
Conclusion
Three.js is a powerful 3D library that enables us to create stunning 3D visuals, interactions, animations, games, and much more. In this article, we have covered how to set up a three.js scene. If you have any questions, feel free to ask in the comment section.
